As part of your vCISO service, we scan your computer for vulnerabilities that could be used by hackers.
The scanner is made by Tenable (https://www.tenable.com/). The scanner has two parts:
This scanner has no access to files or sensitive data as part of the scans. It is only checking your computer settings against a database of tens of thousands of ways that hackers can get in.
Adelia Risk tests and uses all of the products described below before providing them to Client. However, there is always a possibility that security products will conflict with parts of Client’s IT infrastructure. In case of a conflict, Adelia Risk will make best efforts to resolve the conflict. If a conflict can’t be resolved, the product will be removed from this agreement and the monthly subscription fee will be adjusted appropriately.
Here’s all you need to do:
Need help with these instructions? Shoot us an email at support@adeliarisk.com.
To deploy to multiple computers, most IT pros will push a copy of the appropriate Nessus agent to a temp folder on each computer, and then will use a command-line script to install and clean up post install.
For example, a sample command that might work for you is:
msiexec /i C:\Temp\NessusAgent.msi NESSUS_GROUPS=”request_from_support@adeliarisk” NESSUS_SERVER=”cloud.tenable.com:443″ NESSUS_KEY=request_from_support@adeliarisk /qn
IMPORTANT: Please note that you need the double-quotes before and after the NESSUS_GROUPS value.
If this starter script doesn’t work for you, use the documentation from Nessus to build your own command-line instructions: https://docs.tenable.com/nessus/Content/InstallNessusAgentWindows.htm
Please email us at support@adeliarisk.com and let us know that your Tenable Nessus is installed so we can confirm we see it on our side. If possible, please tell us your computer names where you pushed the agent.
Here are some techniques our other clients have used:
Here are instructions for installing Tenable on your Windows computer. It should take you less than 5 minutes.
First, download the correct agent from the Tenable Agents page: https://www.tenable.com/downloads/nessus-agents

Don’t worry if the version number is higher than the 11.0.3 pictured. Just pick the most recent one.
Next, follow the wizard until you reach a screen that looks like this:
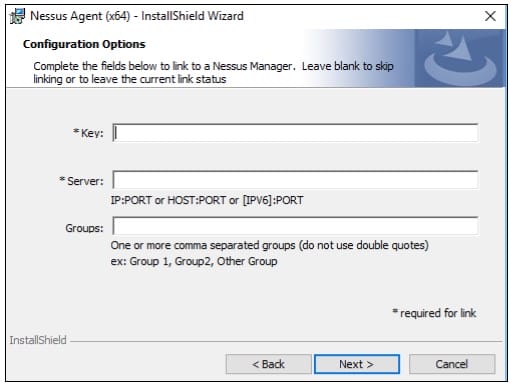
Here’s what to enter:
IMPORTANT: all of these are case sensitive. Please copy and paste them directly.
Here are instructions for installing Tenable on your Windows computer. It should take you less than 5 minutes.
First, download the correct agent from the Tenable Agents page: https://www.tenable.com/downloads/nessus-agents

Don’t worry if the version number is higher than 11.03 pictured. Just pick the most recent one.
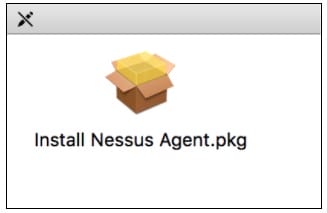
Open the .dmg file, and then click on “Install Nessus Agent.pkg” to install the software.
Follow the installation wizard until it’s complete.
Now, we need to tell the Nessus agent how to talk to us.
On your Mac, go to Applications > Utilities and open the “Terminal” program.
Copy and paste the following in to your Terminal window, then press the return key:
cd /Library/NessusAgent/run/sbin/
Now copy and paste the following in to your Terminal window, then press the return key:
sudo ./nessuscli agent link –key=request_from_support@adeliarisk –host=cloud.tenable.com
–port=443 –groups=”request_from_support@adeliarisk“
IMPORTANT: all of these are case sensitive. Please copy and paste them directly.
ALSO: Please note that you need the double-quotes before and after the groups value.
You’ll probably need to enter your computer’s password after issuing this command. Don’t worry — we don’t get a copy of your password.
If you find that the computer name in tenable[.]io doesn’t match the computer name on your Mac, this is due to a bit of a confusing setup for how Macs manage machine names.
Macs have three different machine names:
Here’s why you’re seeing inconsistencies in these names — Tenable uses #1 (HostName) for their names.
However, HostName is often left blank (because it’s not editable in the GUI). If it’s blank, then the computer uses LocalHostName as the name (and Tenable will pick that up instead).
Here’s how to fix it. Run this command in Terminal on the Mac:
sudo scutil –set HostName <Desired-Name>
That will change the HostName, and you can make it the same as LocalHostName and ComputerName from the GUI.
Need to un-install Tenable? Here are the instructions: https://docs.tenable.com/agent/Content/RemoveNessusAgent.htm